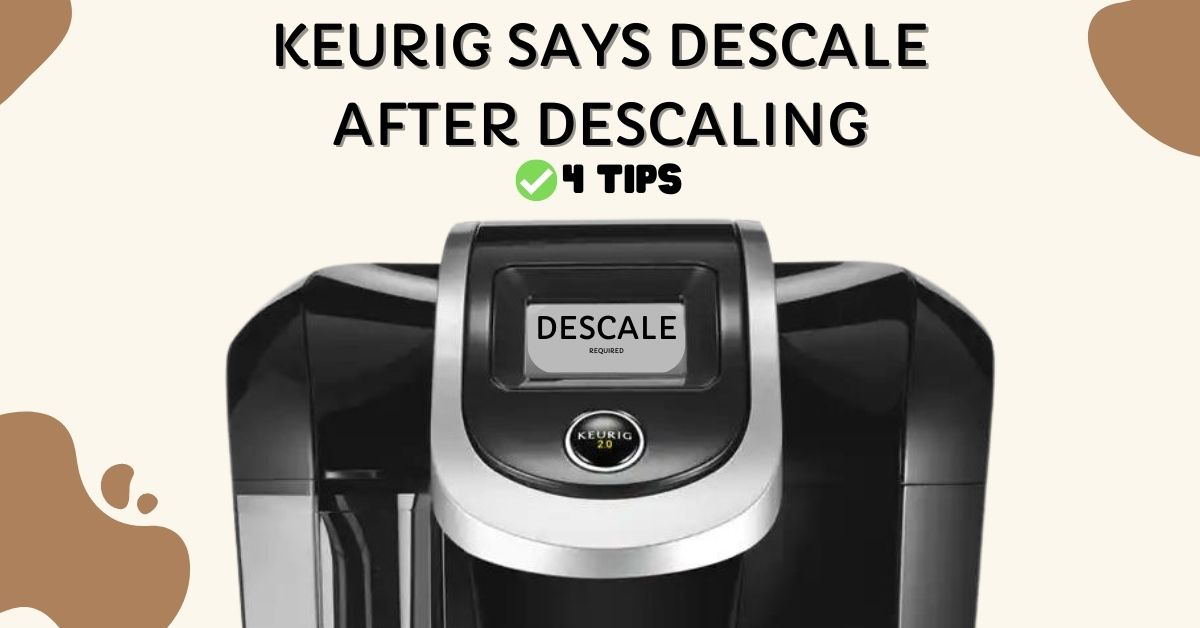
Keurig is a modern marvel for coffee lovers and casual sippers alike. It’s the epitome of convenience, offering a steaming cup of joe at the touch of a button. But what happens when that little descale light, a supposed guardian of your machine’s health, refuses to go off?
You’ve tried the basics: running a descaling solution through the machine, even repeating the process. You’ve scoured the internet, read articles, and watched YouTube tutorials. Yet, that stubborn light remains on, casting a shadow over your morning ritual. “Keurig still says descale after descaling,” you mutter, questioning your machine’s sanity and your own.
Well, fret not. We’re diving deep into unearthing solutions that work. Let’s get that Keurig back on track.
What is Keurig Descale Light?
The descale light on a Keurig coffee maker serves as an essential maintenance indicator. It illuminates to signal the need for descaling, a cleaning process that removes mineral deposits from the machine’s internal components. These deposits, primarily calcium, can accumulate over time due to the minerals commonly found in tap water. If left untreated, these buildups can impair the machine’s performance and compromise the quality of your coffee.
The purpose of the descale light is straightforward: it’s a preventive measure to help you maintain optimal functionality and other brewing problems. However, it’s not uncommon for the descale light to remain on even after the cleaning process has been completed.

How Often Should Descale Keurig?
The general recommendation is to descale your Keurig every three to six months. However, this timeline can vary depending on several factors, including the water hardness and the frequency of use.
For instance, if you live in an area with hard water, mineral deposits will accumulate more quickly, necessitating more frequent descaling. Similarly, heavy usage of the machine will also require you to descale more often.
Some examples of descaling frequencies are displayed in the table below.
| NO. OF COFFEE PER DAY | DESCALING FREQUENCY |
|---|---|
| 1-2 | Every 3 months |
| 3-4 | Every 3 months |
| 5-8 | Every 2 months |
| 8-10 | Every month |
Why Does My Keurig Say Descale After Descaling
The Keurig descale light serves as a warning system, alerting you that your coffee machine requires cleaning. It’s not just a pesky light to ignore; it’s a sign that your machine’s performance and the quality of your coffee are at stake. But what if you’ve followed the descaling process and the light still won’t turn off? Here are some reasons why this might happen:
Incomplete Descaling: Sometimes, one round of descaling isn’t enough. Mineral deposits can be stubborn, requiring a second or even third round of descaling.
Refillable K-cups: If you’re using refillable K-cups, make sure you’re not packing the coffee grounds too tightly. This can restrict water flow and trigger the descale light.
Clogged Water Filter: A dirty water filter can also cause the descale light to stay on. Make sure to replace or clean the filter as needed.
Hard Water: If you’re using hard water, the mineral buildup can be more significant, requiring more frequent descaling.
Clogged Needle: Sometimes, the needle where the coffee flows out can get clogged. A simple cleaning with a paper clip or needle can often solve this problem.
Faulty Sensors: In rare cases, the sensors themselves might be faulty. If you’ve tried everything and the light still won’t turn off, it might be time to contact Keurig customer service.
How To Fix Keurig Descale Light Won’t Turn Off Issue
You’ve descaled your Keurig, but that pesky descale light is still on, taunting you every time you reach for a cup of coffee. It’s a common issue, often stemming from a simple oversight: not setting the Keurig into descale mode before running the descaling solution.
Here’s how to correct that and restore your machine to its optimal state.
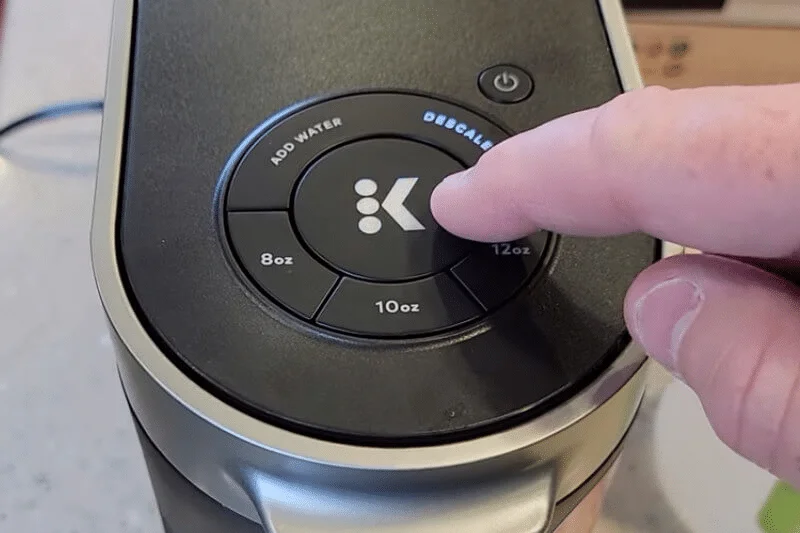
1. Initiating Descale Mode
- Plug in the Keurig: Make sure the machine is plugged in but the power is off.
- Button Combination: Hold down the 8-ounce and 12-ounce buttons simultaneously for about 3 seconds.
- Start Descaling: The “K” brew button should start flashing. Press it to initiate the descaling process.
2. The Descaling Process
- Prepare the Solution: Fill the water reservoir with equal parts of the descaling solution and water. You can also use a mixture of equal parts white vinegar and water.
- Run the Solution: Start the descaling process. Keep running the machine until the “add water” light comes on.
- Wait: Let the machine sit idle for about 30 minutes to allow the descaling solution to work its magic.
3. Rinsing the Machine
- Fill with Water: Fill the water reservoir with regular water.
- Run the Water: Use the largest brew size button to run water through the machine until the “add water” light comes on.
- Repeat: You may need to repeat this process 10-12 times or use up to 3 full reservoirs of water to ensure the descale light turns off.
The descale light is programmed to flash after a preset number of brew cycles. Initiating descale mode informs the machine that it’s being cleaned, resetting this counter. If you skip this step, the Keurig will not recognize the descaling solution as anything different from regular water, keeping the descale light on.
More Solutions Turn Off Descale Light on Keurig
So, you’ve tried the standard descaling process and initiated the descale mode, yet the descale light is still on? Don’t worry; you’re not out of options. There are additional methods you can employ to tackle this issue head-on.
Let’s delve into some alternative solutions that might just do the trick.
1. Use The Right Descaling Solution
The first thing to consider is the type of descaling solution you’re using. Keurig has its own specially formulated descaling solution designed to work with all Keurig models. If you’ve used a different solution and the descale light is still on, it might be time to switch to the Keurig-approved product.
You can buy Keurig’s descaling solution individually or as part of a package that includes rinse pods and filters.
If you have already used the wrong one, try to get rid of the error message by using the descaling solution recommended by Keurig. Adhere to the descaling instructions provided on the package to ensure effective cleaning. If you haven’t descaled your Keurig in over six months, or if you have hard water, you may need to run the descaling process twice for optimal results.
2. Clean Reservoir Valve & Waterline
Another common culprit behind the persistent descale light could be a blocked water reservoir valve. This valve is crucial for the water flow from the tank to your coffee cup. If it’s obstructed, not only will the descale light stay on, but you may also not get the full cup of coffee you desire. Here’s how to clean the valve and waterline:
Steps to Clean the Reservoir Valve & Waterline:
- Locate the water valve connecting the tank to the Keurig.
- Look for any buildup or blockage on the valve.
- Suck up water from the tank with a turkey baster.
- Directly flush the water into the nozzle under the tank.
- Do this a few times to remove any blockage.
- Close the lid, wait 5 minutes, and try brewing again.
Perform this action a few times to ensure that any blockage is thoroughly removed.
3. Clean Obstructions From Needle
If you’ve tried the previous solutions and the descale light still won’t turn off, it’s time to check the exit needle. This needle punctures the K-cup and allows water to flow through, brewing your coffee. A clogged needle can result in incomplete cups and may also contribute to the persistent descale light.
Keurig Needle Cleaning Steps
- Make sure the machine is off and unplugged.
- Lift the brewer’s top and gently remove the pod holder.
- Press the side buttons to detach the holder and flip it to reveal the exit needle.
- Use a straightened paper clip to remove any obstructions from the exit needle. Rinse the holder afterward.
- Open the handle to find the top needles and use the paper clip to clean them as well.
Before brewing coffee, run 2-3 hot water cycles to remove any remaining debris.
Note: If you own a Keurig 2.0, you can use the Orange Needle Maintenance Tool that comes with it for this purpose.
Last Thing You Can Do
If you’ve exhausted all the troubleshooting steps and your Keurig’s descale light still refuses to turn off, it may be time to bring in the experts. The last resort, but often the most effective one, is to contact Keurig Customer Support.
To reach out to Keurig Customer Support, you can visit their official website for contact details or consult the user manual that came with your machine for specific instructions on how to get in touch.
How To Reset Keurig After Descaling?
After you’ve gone through the descaling process and taken all the necessary steps to ensure your Keurig is clean, you might wonder, “Is there anything else I should do?” The answer is yes: resetting your Keurig. This simple action can often be the final touch needed to get your machine back to its optimal state. Here’s how to do it:
- Disconnect your Keurig from the power outlet.
- Remove the water reservoir from the machine.
- Plug the Keurig back into the power outlet and press the start button to turn it on.
- Place the water reservoir back into its slot on the brewer.
- Open and then close the brewer lid to finalize the reset process.
Mistakes To Avoid When Keurig Descale Light Stays On
When faced with a persistent descale light on your Keurig, it’s easy to resort to desperate measures in an attempt to resolve the issue. However, there are certain actions that you should absolutely avoid, as they can exacerbate the problem or even damage your machine. Here’s what not to do:
- Don’t Use Abrasive Cleaners: Stick to Keurig-approved descaling solutions or natural alternatives like vinegar. Abrasive cleaners can damage the internal components of your machine.
- Avoid Forceful Actions: Don’t try to force the water reservoir or any other parts to move. This could break delicate components and void your warranty.
- Don’t Skip Steps: When descaling, follow all the steps in the correct order. Skipping steps can lead to incomplete descaling and may keep the light on.
- Don’t Ignore the Light: The descale light is there for a reason. Ignoring it for an extended period can lead to poor performance and may shorten the lifespan of your Keurig.
- Don’t Overfill the Reservoir: Stick to the recommended water levels when descaling. Overfilling can cause water to leak and may not resolve the descale light issue.
- Avoid Frequent Power Cycles: Constantly turning your machine on and off in quick succession can confuse the system and may not turn off the descale light.
By steering clear of these actions, you’re more likely to successfully resolve the issue without causing additional problems. When in doubt, consult the user manual or contact Keurig Customer Support for professional advice.
Final Words
Armed with the right knowledge and a systematic approach, you can tackle this issue head-on and get back to enjoying your perfect cup of coffee.
From initiating the descale mode to cleaning specific components, each step is crucial in its own right. And if all else fails, don’t hesitate to reach out to the experts at Keurig Customer Support. After all, the ultimate goal is to extend the life of your Keurig and ensure it delivers the best performance possible.

