When your Keurig doesn’t brew the full cup of coffee that you expect, it’s more than just a minor hiccup—it’s a frustrating start to your day. You might even be dealing with Keurig coffee maker problems not brewing a full cup after you’ve tried solutions like descaling. Whether you’re scratching your head over a brand new Keurig not brewing a full cup or you’ve noticed your trusty machine is suddenly not filling your cup as it used to, you’re not alone. This is a common issue that many Keurig users face, and it can turn a simple morning routine into a complicated mess.
But don’t lose hope or get mad at your Keurig just yet. There are several reasons why your Keurig might not be brewing the correct amount of coffee, and the good news is, they’re usually easy to fix! This article will guide you through the steps to resolve this common Keurig problem, so you can get back to enjoying your full cup of morning bliss.
Why Keurig Not Brewing Correct Amount of Coffee
The first thing you might notice when your Keurig isn’t brewing the right amount of coffee is an underfilled cup. It’s easy to jump to conclusions and think something’s broken, but often, the solution is simpler than you’d expect. One of the most common reasons for this issue is that the water reservoir isn’t filled enough. It’s a simple mistake—we’ve all been there. You forget to refill the water, or maybe you didn’t notice the tank was empty. So, before diving into more complex troubleshooting, make sure your water reservoir is filled and try brewing a cup again.
If topping off the water doesn’t solve the problem, then it’s likely there’s a blockage somewhere in your Keurig machine causing the issue. Here are some of the most common culprits:
- Buildup Around the Water Tank Valve: Over time, minerals in the water can build up around the valve, affecting the flow of water into your cup.
- Clogged Needle: The needle that pierces your coffee pod can get clogged with coffee grounds or other debris, limiting the water flow.
- Internal Blocks: Sometimes, it’s not just one part but multiple areas in the machine where mineral deposits or coffee grounds have built up, causing a blockage.
How To Fix Keurig Not Brewing Full Cup
Let’s start with the simplest fix and work our way up.
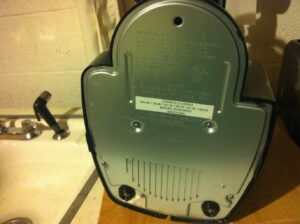
1. Hit The Keurig Bottom
Yes, you read that right. Sometimes, all your Keurig needs is a little tough love. Turn your Keurig upside down and give the bottom a gentle tap. This can help dislodge any coffee grounds or debris that might be causing the blockage. If a gentle tap doesn’t do the trick, it’s time to get a bit more aggressive—but carefully, of course.
Hold your Keurig brewer securely with both hands and shake it up and down vigorously, up to five times. It might sound strange, but this rapid movement can help get rid of any air bubbles in the waterline that could be causing the issue. Many users have found this simple step effective in resolving their Keurig not brewing a full cup problem. If this doesn’t work for you, don’t worry; we have more solutions up our sleeve.
2. Inspect Reservoir Valve
If hitting the bottom of your Keurig didn’t do the trick, the next step is to check the water reservoir valve. This valve is the gateway for water to flow from the tank into your coffee cup, and if it’s blocked, you won’t get the full cup you’re looking for.
- Find the valve that connects the water tank to your Keurig machine.
- Take a close look at the valve. If you see any debris or buildup, clean it off.
- Open the water reservoir lid. Use a turkey baster to suck up some water from the tank.
- Directly splash the baster’s contents into the nozzle.
- Repeat this a few times to make sure you remove any blockage.
Once you’ve done this, close the reservoir lid and wait for about 5 minutes before attempting to brew another cup. This should give the machine enough time to reset and allow for a smoother flow of water.

3. Run Descaling Cycle
If you’ve tried the previous steps and your Keurig is still not brewing a full cup, it’s time to consider a more thorough cleaning process: descaling. Mineral deposits can accumulate not just on the valve but also inside your Keurig brewer, affecting its performance and causing slow dispensing of coffee.
Regular maintenance is key. It’s advisable to descale your Keurig every 3 to 6 months. If you’re using hard water—which is water high in minerals like calcium and magnesium—you should descale more frequently. Not sure if you have hard water? A low-cost water testing kit can help you find out.
What to Use for Descaling?
Keurig offers its own descaling solution that is compatible with all Keurig models and even other coffee makers. This solution is available for purchase individually or in a package that includes rinse pods and filters, making it convenient to maintain your machine.
Follow the instructions on the descaling solution package for the best results. If it’s been more than 6 months since you last descaled, or if you have very hard water, you may need to run two descaling cycles to fully clear out any mineral buildup.
Clean Obstructions From Needle
If you’ve tried all the previous steps and your Keurig is still not delivering that full cup of coffee, it’s time to look at the exit needle. This is the part of your Keurig that punctures the K-cup, allowing water to flow through and brew your coffee. When this needle gets clogged, it can result in your cup being only half full.
If you own a Keurig 2.0, you’re in luck. These models come with an Orange Needle Maintenance Tool designed specifically for this purpose.
If you have a different Keurig model, don’t worry. A simple paper clip will do the job just as well.
Here’s how to do it:
- Make sure your Keurig is off and unplugged.
- Lift the brewer’s top and gently pull out the pod holder.
- Press the side buttons to detach the holder. Flip it to reveal the exit needle.
- Use a straightened paper clip to clear any clogs in the exit needle. Rinse the holder.
- Open the handle, find the top needles, and use the paper clip to clean them.
- Before brewing coffee, run 2-3 hot water cycles to flush out any remaining debris.
Final Words
If your Keurig isn’t brewing a full cup, don’t worry. Most issues can be fixed easily, whether it’s refilling the water, cleaning a valve, descaling, or unclogging needles. Regular upkeep is key, so make descaling a routine task. If all else fails, it might be time for professional help or a new Keurig. After all, you deserve a full cup of good coffee. If none of the solutions in this blog post are helpful, contact customer service at 1-866-901-2739.
FAQs
What To Do If Keurig Does Not Brew Full Cup After Descale?
If your Keurig is not brewing a full cup even after descaling, there may be obstructions in the needle. Cleaning out these obstructions will ensure that your water flow is clear and that you are getting the best quality possible.
How To Adjust Keurig Cup Size
If you are using the wrong size cups, try switching them out for larger or smaller cups and see if that fixes the problem.
Select settings.
Select preferred brew setting
Select the number that fits with the lid on your pod.
Select your preferred brew size.

