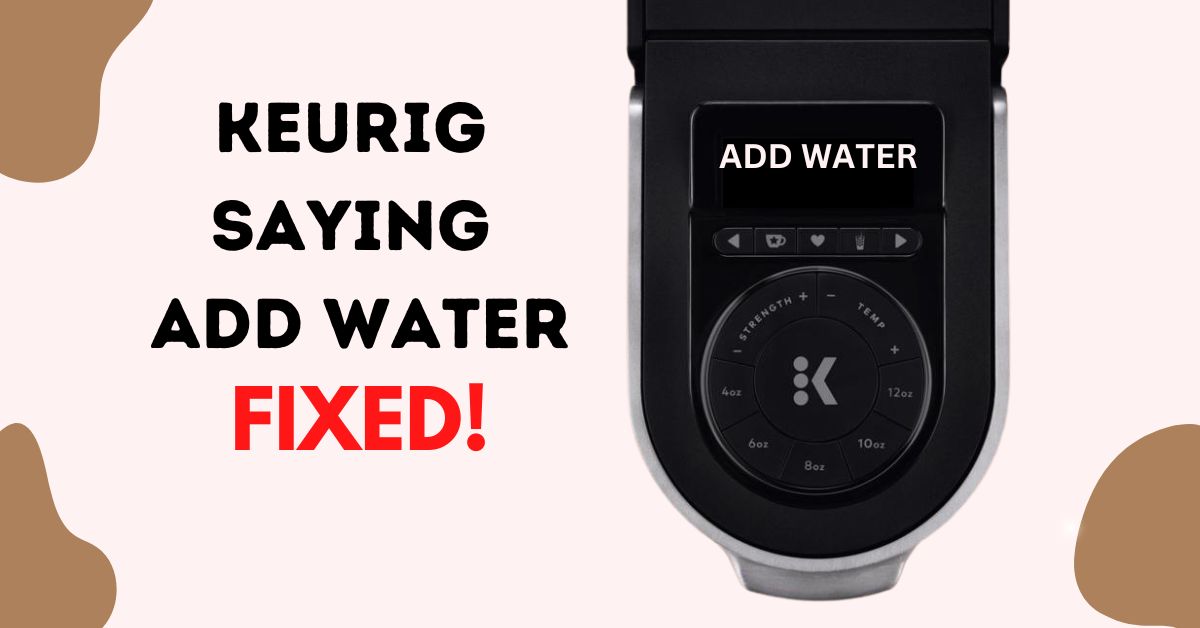
Are you facing issues with your Keurig coffee maker where the ADD WATER LIGHT is not functioning as it should?
Maybe it refuses to come on, leaving you guessing about the water level. Or perhaps it stays on, even when there’s plenty of water in the reservoir.
You’re not alone in this; it’s a common hiccup for Keurig users. But don’t worry, I’m here to help you figure out what’s going on and how to fix it.
In this guide, I delve deep into the possible reasons behind the Keurig ADD WATER light not coming on or stay on issue and offer you straightforward solutions to get your Keurig running smoothly again.
Keurig Add Water Light: How Does It Work?
To get to the root of the “add water” light issues, we first need to understand how this vital feature operates. Essentially, this light is connected to a sensor in your Keurig coffee maker, designed to keep track of the water level in the reservoir tank.
Here’s how it works:
Inside the water reservoir is a float, a small and very lightweight device that floats on the water. It moves up and down, reflecting the water level in the tank.
When the water level falls below a specific point, the float drops, activating a switch in the sensor. This action triggers the “add water” light, signaling that it’s time to refill the tank.
This light serves as a visual cue, alerting you to add more water to continue enjoying your coffee brewing experience without any hitches.
By indicating when to add water, this system prevents you from running the machine dry, protecting both the appliance and your coffee quality.
To get back to brewing your favorite cup, simply add water until the float rises above the sensor’s trigger point, turning off the “add water” light.
Which Keurig Models Feature an ADD WATER Light?
Keurig offers a wide variety of coffee makers, with over 80 different models available in the market. Identifying your specific model is vital, as not all of them come equipped with the add water light feature. You can find your model number on the serial number located either behind the drip tray, on the bottom of the device, or behind the water reservoir. Knowing your Keurig model will help you understand whether your Keurig has the add water light or a similar feature under a different name.
Here is a table showcasing the Keurig models that come with an ADD WATER light:
| K-Classic | K-Mini Plus |
| K-Elite | K-Compact |
| K-Select | 2.0 Models |
| K-Mini |
How To Fix Keurig Add Water Light Stay On or Not Coming On
If the Keurig ADD WATER light stays on or does not come on, it is often a sign of a dirty or faulty sensor. The immediate solution to this problem is to clean or replace the sensor to ensure the proper functioning of your coffee maker.
However, before taking that step, there are a few other solutions you might consider to resolve the issue:
- Set Water Tank Properly
- Clean The Reservoir Valve
- Replace Water Filter
- Reset The Brewer
- Run Descale Cycle
- Clear Possible Air Lock
- Clean the Water Line
- Replace The Sensor
1. Set Water Tank Properly
A common reason the add water light fails to function correctly is improper positioning of the water tank. Ensuring the water tank is set correctly can often solve the problem, so it’s the first thing you should check if you encounter this issue. Here’s how to do it:
- Make sure the machine is unplugged and the water reservoir is empty.
- Remove and clean the water tank thoroughly with mild soap.
- Reinsert the water tank back into the machine, making sure it is securely in place.
- Fill the water tank with fresh water to the appropriate level.
- Plug the machine back in and power it on.
At this point, the add water light should ideally go off, indicating that the issue has been resolved. If the light does not go off after this, move to the next step.
2. Clean The Reservoir Valve
Keeping your Keurig coffee maker working smoothly means taking good care of the reservoir valve. This small part, found at the bottom of the water tank, manages the water flow as you brew your coffee. If you’re using unfiltered water, over time, stuff like limescale can build up in the little hole where the water goes into the machine, making the valve dirty and even blocked. This not only messes with the “add water” light but can stop your Keurig from working at all. To clean the reservoir valve, follow these steps:
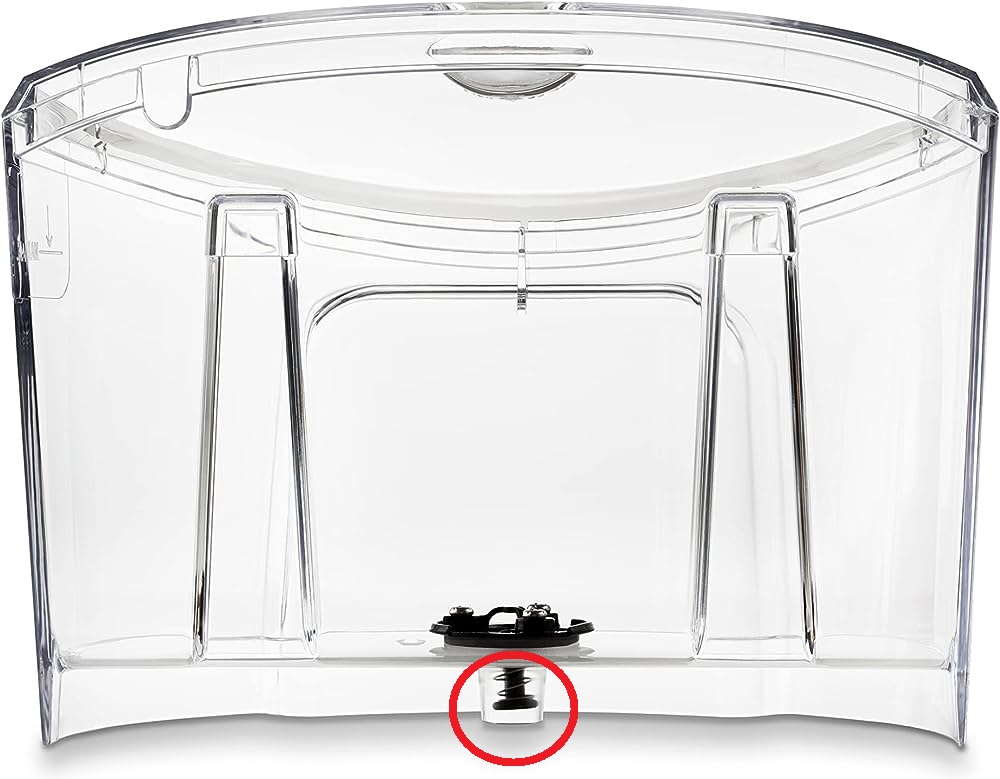
- Remove the water reservoir from the machine.
- Locate the valve at the bottom of the reservoir. It is a small plastic piece that water flows through.
- Using a toothpick or paperclip, gently clean around the valve to remove any debris or buildup that may prevent it from functioning properly.
- Reinstall the reservoir back into the machine.
- Run a water-only brew cycle to flush any remaining debris from the machine.
3. Issue With Water Filter
If your Keurig’s “add water” light isn’t working right, the Keurig water filter might be the culprit. A dirty or clogged filter can mess with the water flow, causing the light to flash or not come on at all. It can even lead to other problems like mineral buildup, bacteria contamination, filter media breakdown, and low water pressure. Yikes, right?
Your Keurig has a purifying filter that doesn’t last forever. It’s designed to work for a certain number of cycles, not a set amount of time. So, the more you use it, the more often you’ll need to change it. If you brew coffee daily, Keurig suggests replacing the filter every two months or after 60 tank refills if you use it less often.
4. Run Descale Cycle
If you find mineral deposits on the reservoir’s valve, these minerals may also build up inside your brewer. As a result, your brewer may be unable to work properly or cause the ADD WATER to come on. To remove this buildup, you can run a descaling cycle. Follow the instructions on the descaling solution or your Keurig model user manual.
I recommend you should descale it every 3 to 6 months. If you use Hard Water (high mineral water), you should descale it more frequently.
Keurig has manufactured its descaling solution that works with all Keurig models. If you have not descaled for more than 6 months or have very hard water, you need to descale twice.
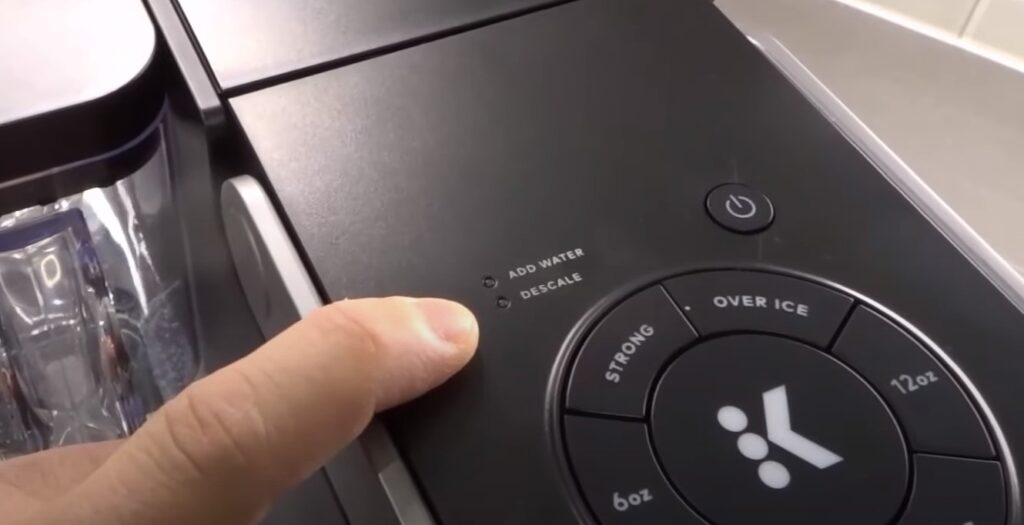
5. Reset The Brewer
Sometimes, your Keurig might act up due to software glitches or setting errors, causing issues like the add water light not functioning as it should. In such cases, resetting the brewer can often help get things back to normal. Though it might not solve all problems, it’s a simple step that can potentially fix many common issues.
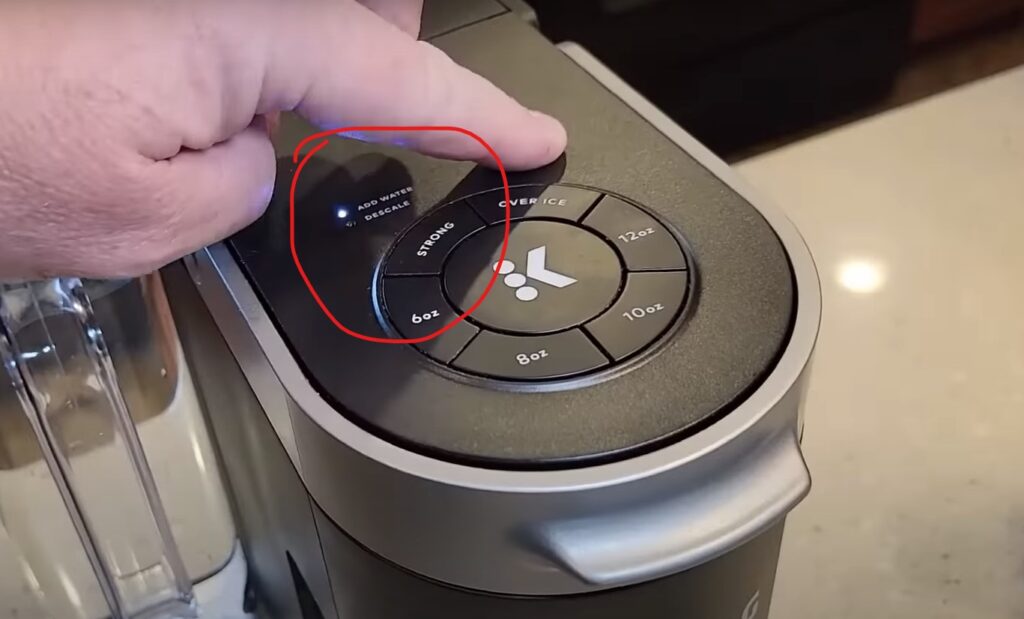
Surprisingly, Keurig coffee makers don’t come with a reset button. Resetting it is still pretty straightforward. Depending on what’s going on with your machine, you might try different steps to reset it. Here are a few methods you can try:
- Unplug the Keurig from the power outlet.
- Take out the water reservoir and then plug the machine back in.
- Press the start button to power up the machine.
- Put the water reservoir back into its place on the brewer.
- Open and close the brewer lid to complete the reset.
6. Clear Possible Air Lock
Sometimes, the trouble with your Keurig’s “add water” light is due to air getting trapped in the machine’s water lines or overflow tubing, creating what’s known as an air lock. This usually happens when the machine hasn’t been used for a while or if you’ve tried to brew with too little water. Luckily, it’s not too hard to fix this issue. Here’s how you can go about it:
- Unplug the machine and fill the half-water reservoir.
- Hold the Keurig machine with both hands and gently shake it up and down for about 15-20 seconds. This will help to dislodge any air bubbles that may be present in the water lines.
- Keep shaking until the air bubbles stop appearing at the valve at the base of the reservoir.
- Then, run a water-only brew cycle to flush any remaining debris from the machine.
- Plug the machine back in and power it on.
- Run a water-only brew cycle to flush any remaining debris from the machine.
7. Clean the Water Line
A common issue that can cause the “add water” light to stay on is the buildup of dirt, debris, and even old coffee residue in the tubing of your Keurig. This is a part that’s quite close to the K-cup and the spout, making it prone to clogs and airlocks. Here’s how you can clean it up to potentially solve the problem:
- Remove and empty the water tank, including the water filter holder.
- Turn the reservoir upside down to find the spring-loaded nozzle.
- Test the spring using the eraser end of a pencil by pushing it a few times to see if it moves easily – if it does, there’s an issue with the water line.
- Reattach the tank to the Keurig and add a little water.
- Use a turkey baster to suck up some of the water.
- Forcefully squirt the water back into the nozzle to clean out the water line and nozzle.
- Repeat the process until the water flows clearly through the line.
Many people have found success with this method, getting their Keurig back to normal functioning. It’s a simple yet effective way to maintain your machine and ensure a smooth coffee brewing experience.
8. Replace The Sensor
If you’ve exhausted all other troubleshooting avenues and the “add water” light persists, it might be time to delve deeper into the more advanced issues, with the water level sensor being a common culprit. This sensor plays a crucial role in monitoring the water level in the reservoir and alerting the machine when it’s time to refill. However, when it malfunctions, it can falsely trigger the “add water” light even when the reservoir is adequately filled.
Before deciding to replace the sensor, be aware that doing so can void your Keurig’s warranty. Therefore, it’s highly recommended to reach out to Keurig’s customer service for guidance and assistance.
If you choose to proceed with the replacement yourself, here’s what you’ll need to do:
- Disassemble your Keurig to locate the water level sensor. This task requires a bit of technical know-how as you’ll be dealing with the internal components of the machine.
- Identify and unplug the sensor from the circuit board. Once you find it, remove it carefully to avoid damaging other parts.
- Replace it with a new sensor. Ensure you have a compatible sensor at hand to replace the faulty one.
- Reassemble your Keurig and test it to see if the issue has been resolved.
Taking this step is a bit of a last resort, but it can potentially solve the problem and get your Keurig back to brewing your favorite cups of coffee without any hitches.
Last Hope: Contact Keurig Support
When all else fails, and none of the troubleshooting steps seem to resolve the persistent “add water” light issue on your Keurig, it’s time to reach out to Keurig’s customer support. They have the expertise and resources to guide you through advanced solutions or advise on whether it’s best to Keurig professionals.
While the other methods I’ve discussed can often get your Keurig back on track, it’s crucial to remember that tinkering too much with your coffee maker can void the warranty. Therefore, consulting Keurig’s support should be your last resort.
In conclusion, the Keurig add water light issue can be frustrating, but it’s often solvable by following the steps we’ve discussed in this article. From cleaning the reservoir to clearing airlocks and addressing sensor problems, these methods can help you enjoy uninterrupted coffee brewing once again.

